 [Part 1 of our scrapbooking article]
= = = = = = =
#10. What Order?
There are no specific rules stating that all photographs or mementos must be placed in chronological order. Therefore, it is completely up you the order you wish to place your items and embellishments. You can place your items in a formal chronological order. You can also group items into formal or informal categories such as similar colors, events, activities, individuals, or families. Items can also be placed into random, abstract, or collages.
Each order has its own place in scrapbooking. For instance, chronological order might be useful for an anniversary scrapbook. Pictures and mementos of the couple’s years together could be placed from the first day they met through the wedding day to the present day with each time period on a different page. This presents a feel of as time goes by.
However, a scrapbook for a parent might just have a collage of pictures and drawings. In this case, a collage lends to a feeling of overwhelmingly being loved.
#11. A Title For Your Page
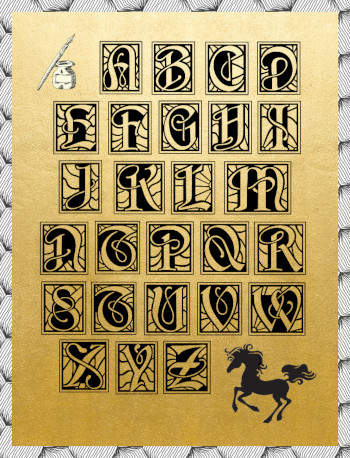
Unless your page is a continuation of the previous page, you need a title. You may remember the point of a particular page at this point in time but in three months you might have forgotten. And, if others are reading your scrapbook (and don’t you hope they will?) then they may not understand the purpose of a page. And the easiest way to clarify the theme is with a title. And the gorgeous alphabet letters like those on this page are a good good start.
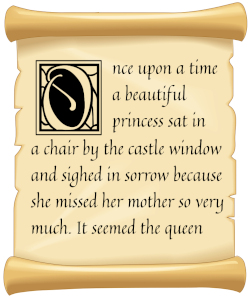 This alphabet, like all the other alphabets on BlissPlan, is printable. And, they’re easily resized to fit any page. You might want a complete title with these beauties or you might want to have an individual letter with ‘regular’ text following it, like the way we used it on this scroll on the right. Or you may have an even more creative way to use the letters.
#12. Text in Your Scrapbook
You may or may not want to add text to your scrapbook page. You may want to just write captions below the pictures. You may want to add your own stories or poems. You may want to add journals describing the day to day life of your baby or your child’s accomplishments. Text can be used as either a focal point or simply as a supporting piece.
Text may be hand written. Alternately, computer fonts, letters, text, or three-dimensional images can also be printed or cut and pasted onto the page. In this way, various styles, colors, textures, and visual text effects are possible.
#13. Scrapbook Tags
Tags are a little added touch of professionalism that adds to the overall well thought out look to your scrapbook. Tags can be used for accents, captions, and thought bubbles as well as dedications. The design of your tags will depend entirely on your personal needs and desires.
Thus, tags can be big or small, square or specially shaped, white or colored, plain or textured.
Furthermore, tags need not be made of paper. Some of the most interesting tags are made from fabric, wood, and furniture odds and ends found around the house. Be creative.
Pre-made tags are available at most craft or office supply stores.
#14. Embellishments
Your own unique embellishments add a special personal touch to your scrapbook pages. Embellishments can be used as the main focus of your page, to highlight items, or as borders. Embellishments can range from simple items such as stickers and ribbon to more complex techniques such as adding faux beads and silver accenting. Use your imagination and creativity.
Embellishments need not be expensive. Odds and ends that you have from other craft projects work just fine. Be on the lookout for sales on fabric, plastic flowers, lace, beads, and whatever else takes your fancy. These items will no doubt come in handy on your next scrapbook project. Also keep a sharp eye out for deals in second hand stores and garage sales. Often used items can be ripped apart and the pieces reused literally for only pennies.
#15. Patterning
How can you arrange your scrapbook page to best show off your mementos and embellishments? You can place everything in the center of your page, place a single focus item in the center, or divide the page into sections adding items to each section. You may also choose to lay the items out in a standard recipe or calendar layout.
Shapes also make interesting placement patterns. Common shapes include circles, squares, hearts, and stars. However, you can also place items in object patterns such as mountains, trains, or Christmas trees.
The shape you choose for your scrapbook will depend entirely on your theme. For instance, a logical shape for a wedding or Valentines Day scrapbook is a heart. A nice shape for a Christmas scrapbook is a Christmas tree. You might make a cake pattern for you niece the pastry cook. Let your imagination and creativity be your guide.
Various ready made patterning templates are available on the market.
#16. Spacing
Spacing is a difficult matter. There is a fine line between having a balanced scrapbook page and a gaudy mess. If items are too closely spaced your reader will feel overwhelmed. If your items are spaced to far apart your viewer will feel short changed.
Look at your page.
Close your eyes.
Open them again.
* Does your page look cluttered?
* Does your page have more photographs than background?
* Are your embellishments drawing the focus away from your mementos?
Then, you need to simplify your page a bit and increase the spacing between objects. Remember you can always add more pages.
* Is your page bare?
* Is your page uninteresting and colorless?
Then, think about adding some more mementos and colorful embellishments. In this way, you can decrease the spacing between objects making your page more energetic.
#17. Mounting
Once your scrapbooking page is laid out to your liking you can begin attaching and gluing your various mementos, text, and titles. Never glue as you go! Not only will glue end up all over the place but you will no doubt find out too late that the title doesn’t go well with the photograph or that the spacing is too tight.
There are several ways to attach items to your scrapbook page. Some of the best sanity savers include glue dots, glue pens, Xyron adhesives, and two-sided tape. Glue dots and glue are fairly mess free and stick to almost anything made of paper or fiber. Mini glue dots are great for those very small items. Xyron adhesives and two-sided tape works for those larger jobs and work on almost any item type.
#18. Getting Rid of Messes & Mistakes
No matter how careful you are, you will undoubtedly find a mistake, mark, or mess on your finished scrapbook page. If you find a mistake, mark, or glue bits on your scrapbook page, just rub it off using a soft white eraser.
Alternately, make the mark into an interesting squiggle or doodle.
For mistakes in journal text, cover the mistake with a sticker the same color as the journal page. Then, just write over the sticker. White out can also be used for white pages.
Fingerprint smudges on your photographs can be removed by rubbing the fingerprints with a piece of flannel or a dry baby wipe.
Excess powder or glitter can be brushed away. This is time consuming and frustrating. The best solution is to reduce static electricity before you add the powder or glitter. Just place a dryer sheet on top of the page before you work.
#19. Preservation
You put a great deal of time, thought, and effort into your scrapbook pages. Therefore, you should try to protect and preserve your work.
The most important way to protect your pages is by using lignin free and acid free products. Lignin free and acid free protects will reduce yellowing and crumbling. Also, use colored paper or ink that is resistant to fading due to age, exposure to light, heat, and other unfavorable conditions.
To protect your page from the outside world, use Mylar or page protectors. Special page protectors for three-dimensional pages are also available at most craft stores. These protection pages not only protect your objects but also reduce indentations caused by three-dimensional objects.
#20. Making Copies
The great thing about modern technology is that you can make copies of your baby announces, recipes, and calendars without a great deal of hassle. This reduces time and money. Furthermore, the ability to copy scrapbook pages allows more scrapbooking uses.
Simply scan and print pictures onto paper or vellum. Then, paste your pictures onto cardstock and add a ribbon or other embellishment. Quickly and easily you have another copy of your baby announcement, recipe, or calendar.
#21. Newspaper Clippings
A popular addition to scrapbook pages is newspaper clippings. Newspaper clippings of birth announcements, team photographs, or favorite celebrities add a personal touch to scrapbook pages.
Newspaper contains about 4% lignin. Therefore, yellowing and brittleness of the newspaper paper will eventually occur. However, since the percentage of lignin is low, newspaper will preserve for many years before this deterioration process begins to occur. To further slow this process, use Mylar or page protectors to protect the newspaper from the outside elements.
#22. Graphics and Clipart
Various graphics and clip art are available on the Internet. Many of these items can be downloaded or printed for free. Downloading and printing images is a good way to find pictures or photographs of your child’s favorite television character or band for a unique personalized touch. Print these graphics or clipart directly onto lignin-free and acid-free paper.
#23. Kid’s Art
Kids bring home the greatest creations of macaroni, glitter, and finger paint. Unfortunately, the macaroni bits and glitter is soon all over the floor or eaten by the dog.
To save these creations, without the macaroni and glitter mess, simply scan and print your child’s creations for use in your next scrapbook.
Kid’s art is great for use for kid’s rooms, grandparent scrapbooks, and kid’s scrapbooks. These pictures can be used as backgrounds, as focus items, or as embellishments.
#24. Weaving Photographs
For more dramatic results from your photographs, trying weaving two copies of the same photograph together. This technique creates a three-dimensional artist look. This technique would look great on a scrapbook for a graduating art student or a scrapbook for a friend who is quite artist and creative. This technique might also look good on a child’s scrapbook with a kid’s art background giving the whole page an abstract look.
To achieve this technique, first you need two copies of the same photo. On one photograph, draw evenly spaced vertical lines on the back of the picture. Cut along these lines with scissors or an exacto knife. On the other photograph draw and cut along evenly spaced horizontal lines.
Next, using alternate strips, from photograph one and then photograph two, weave the pieces together. To preserve the rectangular shape of the photographs, start your weaving in the center of the piece and work outwards.
Leave a Reply