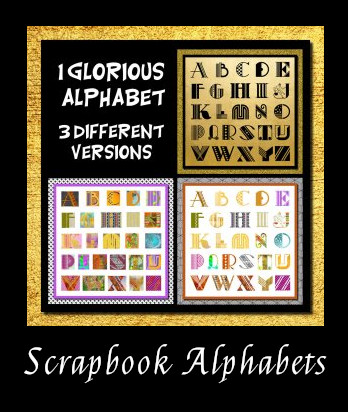
 In our continuing series on scrapbooking, we explain even more ways to create eye-popping, incredible scrapbook pages that will impress all your friends and make a keepsake that your family will treasure for generations. Through the use of great looking printable alphabets, like those on the left, and other embellishments as explained in this series of articles, creating a masterpiece is glorious fun.
= = = = = = =
#25. Collage
Collages are congregations of photographs or news clippings. These items can be placed in any order or pattern. Collages can have a theme such as a single individual or an entire family group combined.
Collages create great funky scrapbook pages. This method is especially useful for surprise scrapbooks meant to overwhelm the reader either with all of their accomplishments or all those that care for them.
In addition to photographs and news clippings, collages can also contain blocks of text or embellishment. These additions can be used to increase the busyness and overwhelming nature of the collage or reduce the effect slightly by distracting the focus away from the collage.
To reduce shifting of the photographs as you select an appropriate collage design, place temporary tape on each photograph or newspaper clipping. Once the display is set, start permanently attaching the collage to the background.
#26. Photograph Mosaics
An attractive technique for placing photographs into scrapbooks is the photograph mosaic. Mosaics stretch photographs into an artistic rendition of the original photograph. Maps can also be stretched in this way. This method might be employed to create a funky look for a friend scrapbook or as a background for someone who likes computers, GIS, or geography.
A basic cropping technique is used to create a photographic mosaic. Simply cut a photograph into evenly spaced squares. Then, glue the squares onto the background leaving an equal space between each square.
A white background or a background matching the background color of the photograph will add to the effect. A background of a contrasting color will reduce the spaced out effect of the photograph.
#27. Markers
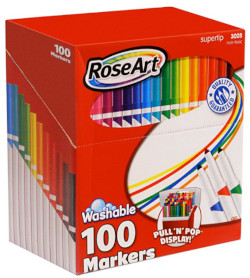 A marker is a seemingly obvious tool for writing and embellishing on scrapbook pages. Markers are easy to draw with and can be used to color in portions of lettering, in borders, or to create accents. Unfortunately, regular markers tend to smudge and bleed through scrapbook pages.##
Nonetheless, there are a few brands of markers (Markers Pigma and Color Workshop Blo Pens) available in craft and office supply stores that do not smudge or bleed. These markers are also acid free, fade resistant, waterproof, and available in a variety of colors.
#28. Wax Pencils
Another important writing implement for scrapbooking is a wax pencil. Wax pencils are soft pencils designed to write on glass, plastic and photographs. These pencils are easy to draw with and can be used to color in portions of lettering, in borders, or to create accents.
The unique thing about wax pencils is that if they are used on the front of a photograph, the ink will rub off. However, when used on the back of a photograph, the ink will become permanent. Wax pencil ink is acid free and available in a variety of colors.
#29. Rubber Stamping
Rubber stamps dipped in acid free ink can be used to create various embellishments. Rubber stamps can be used to create cute images for children’s and grandparents scrapbooks. They can also be simple flowers or leaves to create elegant looks for gift scrapbooks.
Furthermore, these embellishments can be used to focus on a certain photograph or memento. Alternately, these embellishments can be used to soften the look of a busy or sharp image.
One low cost alternative to the rubber stamp is a cotton ball. This creates a shadowy effect.
Another alternative is to buy the pads and attach them to furniture castors. The thick caster allows you to position the stamp in exactly the right place. Moreover, attaching the stamp to a wider base allows you to press more evenly on the stamp. This creates a complete and evenly balanced stamp every time.
#30. Stickers
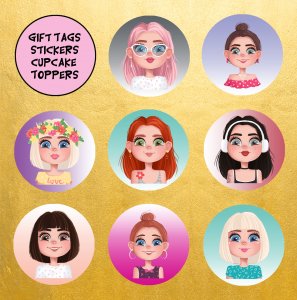 Stickers are fun and easy to stick to scrapbook pages. Stickers can be all kinds of fun – like these gorgeous scrapbooking stickers of beautiful young girls that you can print and make for yourself.
Stickers can be used for captions, thought bubbles, to hide mistakes, or as embellishments. Stickers of your child’s favorite cartoon or television program can add a personal accent to your scrapbook page.
However, not all stickers are suitable for scrapbooking. Check to see if the stickers are lignin free and acid free. Furthermore, be careful that the sticker adhesive does not dry out or seep around the edges. Never place a sticker on a photograph as the adhesive may cause irreversible damage to the photograph.
#31. Faux Wax Seals
A good way to make your own personal seals is with Crayola Model Magic. Simply, roll out a small ball of the clay. Then, imprint this ball with a small rubber stamp or a brass seal. In this way, you can create whatever stamp impressions you can imagine.
#32. Tearing
As the word suggests, tearing is the ripping of paper or tissue paper into various shapes or abstract forms. Tearing creates an artist look to backgrounds, borders, and embellishments.
Be aware however, because tearing does not comply well with all themes. In some more formal themes tearing appears unprofessional.
#33. Fraying
Fraying can create extremely interesting and artist border accents. Fraying looks especially good in children’s scrapbooks, as well as pages for your more creative and imaginative friends. Be careful, fraying does not comply well with all themes. In some more formal themes fraying creates an unprofessional appearance.
Just cut your paper border about an inch larger than you need. Then, dampen this border by dipping only the edges of the paper into a shallow dish of water. Then, the edges of the paper can then be easily pulled off.
#34. Curled Edges
For a unique look to your background and borders, curl the edges of your border and background pages. Curled edges give depth to a scrapbook page. Furthermore, curled edges can soften and reduce the focus of a busy scrapbook page by directing the eye outwards.
To create a curled look, simply wet one edge of the border or background paper. Next, using your fingers, manipulate the paper into a curl. This curled edge can then be left as is, chalked, or inked for a more dramatic effect.
#35. Antique Look
An antique look can increase the dramatic impact of your theme or add a feeling of wisdom and age to your scrapbooking page. Adding an antique look to your background or journals can be accomplished in several ways.
One way is to simply wrinkle cardstock. Another way is to scratch the paper with an emery board or sandpaper. Your antique page can then be left as is, chalked, or inked for an even more dramatic effect.
#36. Leather Look
A leather look can add elegance to your scrapbooking page.
To create a unique leather look, simply distress cardstock. To do this, grip the cardstock in your hands. Then, with a gentle circular motion, rub the cardstock together as if you were pre-treating a laundry stain. Gradually, work your way around the cardstock until you get the desired effect.
#37. Accents
Simple accents can be added to your pictures, borders, and backgrounds to create an air of softness and elegance. Simply rub chalk (or eye shadow) along the edges of the paper. The color of chalk chosen can be either a similar color to the background, a contrasting color, or an outlining color such as black or grey depending on the result you want.
#38. Punching
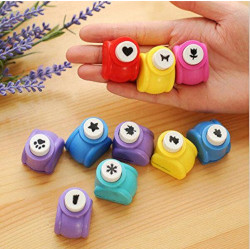 Basically punching is the cutting out of an image or piece of text using a cookie cutter like tool called a punch. Most punches are made of die cast steel. They come in various shapes and sizes. Photographs and text blocks can be punched into virtually any shapes or sizes. These shapes can add to the impact of the themes.
For instance, pictures of your sweetheart can be punched into heart shapes to add to the romantic type of love. Alternately, small doves can be punched and placed along the borders to add a romantic touch to a wedding scrapbook. Titles and text can also be punched to create professional looking scrapbook pages.
When punching out and gluing small pieces of paper, place a strip of double-sided tape on the paper before punching out the shape. Next, just punch the tape into shape. Then, the piece is immediately ready to place.
#39. Colored Paper
Additional color can be easily added to your scrapbook page through different colored backgrounds, borders, and embellishments. A light colored background creates a soft, farther away feeling; while a darker background sharpens the focus. Complimentary colors can be slightly lighter or darker than the background to direct the focus towards or away from portions of the page. Contrasting colors can also be used to create a more dramatic or focusing effect away from or towards various photographs or mementos.
Simply add, fold, or paste additional sheets of paper into your design for the desired effect.
#40. Vellum
Vellum is a transparent, translucent material. Vellum can be used to create a slight shadow or shade change to background or embellishment colors. This can be used as a softening agent for baby scrapbooks, as a touch of elegance to gift scrapbooks, or to create dimension in a boring flat page.
To reduce the cloudiness effect caused by gluing, apply only a thin line of glue along the edges of the vellum. In this way, you will see a slight shadow only along the very edge. This will look like a border to the vellum. Vellum is available in both acidic and non acidic forms.
#41. Shadow Boxes
A great way to add depth to your scrapbook page is to add shadow boxes. Basically shadow boxes add a shadow to your images. Shadow boxes are also a great way to make your most important photographs or text boxes stand out form the rest of the page. Shadow boxes can also be to emphasis dedications.
To make a shadow box, simply cut a box shape out of paper. Next, put your embellishment on a larger square of cardstock. Then, add glue to all four sides of the cardstock square and attach it to the back of your paper. The embellishment will show through, adding greater dimension to your page.
#42. Patterned Paper
Patterned paper can be used for backgrounds, borders, and embellishments. Often plain white backgrounds look rather boring and dull. Patterned backgrounds add a touch of excitement to your page. The right pattern tailored to your theme and purpose can also increase that professional look.
Colors and patterns can be used to coordinate with your photographs or to add dramatic effects. Paper with various themes and patterns is widely available. For instance, a birthday scrapbook could have a background made of your favorite gift wrap. This could add a touch of elegance or a touch of humor depending upon the patterned paper you choose.
= = = = = = =
Leave a Reply